Catch Lobster with Fishing Rod

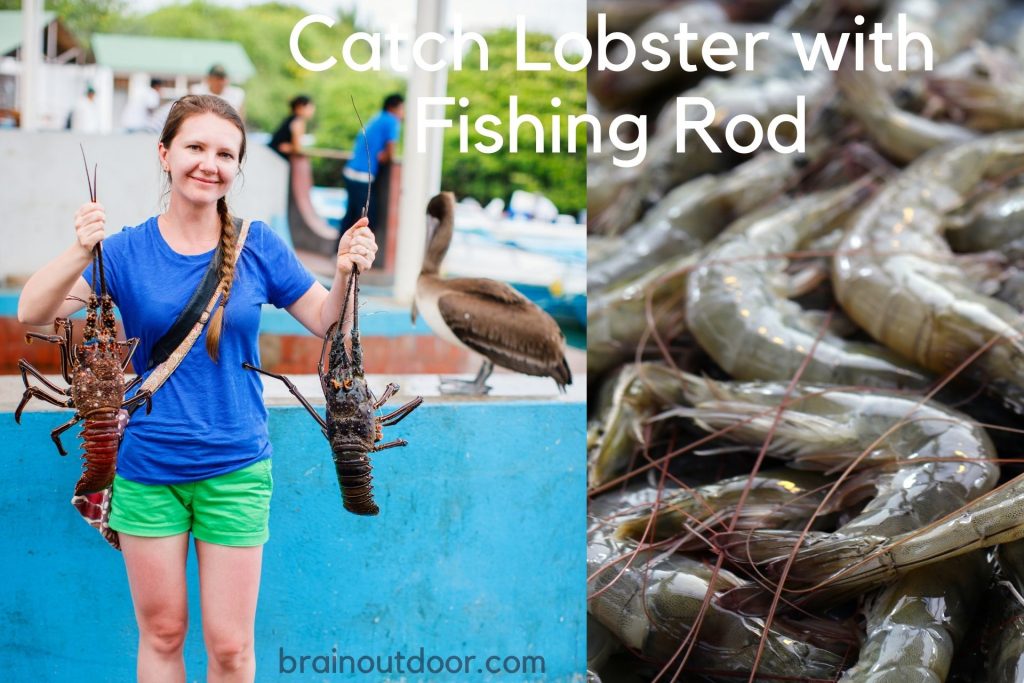
A fishing rod is not meant for catching fish only. Not so many people have an idea how to catch lobster with a fishing rod. The most common methods of catching lobsters are either by hand or with nets. Before you set to catch lobsters, you need to learn regulations for lobster fishing. Fishing them needs one to get a license. Note that these regulations vary from state to state. In this guide, we’re going to learn how to catch lobster with a fishing rod.

Know The Right Time To Catch Lobsters?

There are more lobsters to catch in late June and December than in the other months of the year. However, it’s important to keep in mind different regions will have a different lobster fishing season. For example, instead of June and December, you are likely to find lobsters in large quantities in the other months in places like New Zealand. If you want to catch more lobsters or have luck catching, try fishing at night.

During the night, the lobsters will come out to look for food. The sites where there is a large concentration of lobsters are places like Maine, New England. Lobsters like to hide around the coral reefs. You are likely to spot lobsters eating or hiding in these places, including rocky areas.

Catch Lobster with Fishing Rod

Related:  How to Hang Air Plants with Fishing Line

Choose A Suitable Rod For Lobster Fishing

The right gear will make you have a great fishing experience. Fishing rods come in various designs, and you can get a spinning or a bait casting rod. But a baitcasting rod is the best for several reasons.

The rod should be durable enough to withstand the weight, and it should be easy to use when casting. You will need a graphite rod. What matters the most is finding the right fishing gear – including the rod, reel, and line. For fishing lines, a monofilament will work fine since casting with it is relatively easy. You can also use a braided line if you prefer to.

The Best Bait

Lobsters eat anything thrown their way. Creating bait for them is therefore not that hard. Meaty foods do attract them the most. If you want to have a catch quickly, add its favorite bait. It will lure it pretty fast and eventually get caught. Some of the fishing baits most fishers used for catching lobsters include sea-mussel, fish heads, fish frames, mussel, among others.

Lobsters are not like crabs that need fresh baits. To catch a lobster easily, use any stale bait. You can research more on the best baits’ lobsters are attracted to, such as Bluefish, menhaden, mackerel, and salted herring. Also, check the fishing regulations for lobsters to avoid catching them illegally.

Related:  How to Hang Air Plants with Fishing Line

In Case There Isn’t Any Catch

When lobsters get caught to the hook, you will feel a tug on the line. In case there is nothing on the fishing line, it means that it hasn’t caught anything. Sometimes you could be fishing in the wrong areas where there are no lobsters. If you are also using the incorrect lures and baits, you reduce catching any lobsters.

Spool The Fishing Line

Spool the fishing line to the reel. Ensure you end up over spooling as the reel. It will make casting a little hard to do. For a long cast, you will need to have enough line on the reel to enable you to do the extended casting. Add the hook to it and the bait of your choice to the fishing hook. There are several fishing knots one can use to tie the fishing hook on the line. A Palomar knot is among the common ones used by most anglers. You can also connect a weight at the end of the tag line to increase the chances of the lobster getting caught.

Cast The Rod

Catch Lobster with Fishing Rod

Lower your bait underwater by casting the rod and wait for a few seconds to have a catch. You can choose to have an overhead cast or any other method. You also need to cats with your dominant hand. Waiting ensures the lobsters catch the bait before you start to reel. It makes you sure the lobster has taken the bait. When a lobster gets caught, it will struggle to try and get out of water. Do not reel immediately and wait before starting to spool. Keep reeling in the fish until you get it out of water.

Reeling

Different rods will have a baitcasting, spinning, or a spin caster reel. With a spin caster, you will need to push the button. With a baitcasting reel, it also requires a push of a button to reel. To properly reel the lobster, allow the rod to be at a 45-angle degree, and the drag has stopped moving.

Start to reel when their lobster has stopped making movements in the water. Depending on the lobster’s size, it might make the rod bend slightly as you lift it off the water. Continue doing this until you get the lobster out of the water surface.

Release The Lobster

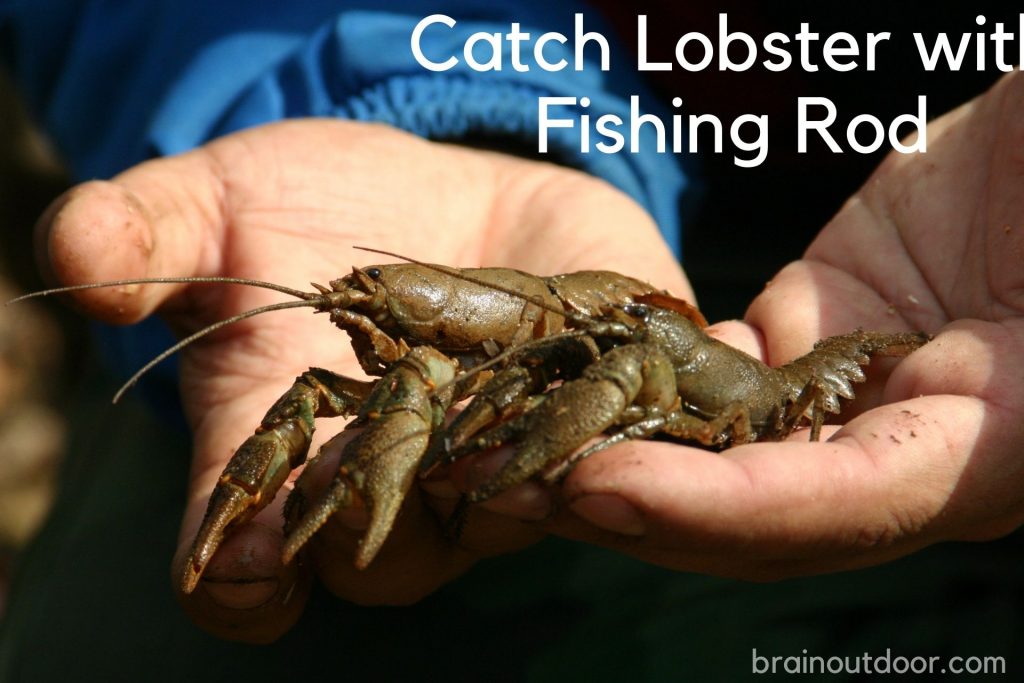
Release the lobster once you get hold of it, do not wait until it is exhausted. Release it gently, and most lobsters, when caught, get released when still alive. You can also use a release tool to help remove the lobster from the hook. After releasing them from the fishing hook, store them somewhere safe to die from more exhaustion. They die quickly and need proper care after removing them from the water.

Catching lobsters using a fishing rod is not something that will take much of your time. You will apply the same technique when catching fish with a fishing rod. Know where there is a higher concentration of lobsters if you want to get lucky catching one with a rod. Use appropriate baits that will attract the lobsters. It is also worth remembering not all the fishing baits used for other types of fish will be useful for lobsters. Lastly, once you have the lobster attached to the hook, release it immediately it gets out of water.

1 COMMENT

  1. Your comment is awaiting moderation

    Inputting My Measurements and Preferences
    With my chosen design toolтАЪ KitchenCraft ProтАЪ selectedтАЪ the next step was inputting my kitchen’s precise measurements. This proved surprisingly straightforward. The software guided me through a step-by-step processтАЪ prompting me to enter the length and width of each wallтАЪ the location of windows and doorsтАЪ and the dimensions of existing fixtures like sinks and ovens. I found the interface incredibly intuitiveтАЪ with clear instructions and helpful visual aids. I even appreciated the option to upload a floor plan image to assist with the process. InitiallyтАЪ I struggled a bit with accurately measuring some awkwardly shaped alcovesтАЪ but the platform’s customer support chat was incredibly helpfulтАЪ providing quick and efficient guidance. Once the dimensions were finalizedтАЪ I began to personalize the design. This is where the fun really started! I selected my preferred cabinet stylesтАЪ choosing from a comprehensive library of options ranging from sleek modern designs to more traditionalтАЪ rustic styles. I meticulously chose the colorsтАЪ finishesтАЪ and countertop materialsтАЪ experimenting with different combinations to find the perfect aesthetic. I even incorporated my existing appliancesтАЪ ensuring they fit seamlessly into the new layout. The software allowed for precise placement of every elementтАЪ down to the smallest detail. I spent hours tweaking and refiningтАЪ meticulously considering factors such as workflow efficiency and aesthetic harmony. The process felt like playing a sophisticated digital puzzleтАЪ and the satisfaction of seeing my vision slowly take shape on the screen was incredibly rewarding. I discovered that the software’s flexibility allowed me to explore different layouts and experiment with various design choices without any commitmentтАЪ a feature I truly appreciated. It was a crucial step in ensuring my final design would be both functional and visually appealing.

    https://callmeconstruction.com/bathroom/my-bathroom-transformation-a-tile-journey/

    [url=https://callmeconstruction.com/bathroom/interior-design-ideas-for-your-master-bathroom-oasis/]https://callmeconstruction.com/bathroom/interior-design-ideas-for-your-master-bathroom-oasis/[/url]

    AgakRJuhq23k

    My kitchen renovation started with a daunting taskтБЪ finding the perfect free online design tool. I initially felt overwhelmed by the sheer number of options available. I spent several days researchingтАЪ reading reviewsтАЪ and comparing features. Some platforms boasted impressive 3D rendering capabilitiesтАЪ but lacked the intuitive interface I craved. Others offered simpler designs but lacked customization options. I needed a balance of visual appeal and user-friendliness. After much deliberationтАЪ I settled on “KitchenCraft ProтАЪ” a platform recommended by a friendтАЪ Amelia. KitchenCraft Pro offered a user-friendly drag-and-drop interfaceтАЪ a wide selection of appliances and cabinetry stylesтАЪ and surprisingly detailed customization options. The initial learning curve was minimal; I was able to navigate the software and start designing within minutes. I particularly appreciated the ability to import my own images and textures to personalize the designтАЪ ensuring it accurately reflected my unique style and preferences. The free version provided ample features for my needsтАЪ although I did note that some advanced featuresтАЪ like photorealistic renderingтАЪ were reserved for paid subscriptions. HoweverтАЪ for my purposesтАЪ the free tools were more than sufficient. The decision to use KitchenCraft Pro proved to be a great oneтАЪ setting the stage for a successful and enjoyable design process. I highly recommend thoroughly researching and comparing different free online kitchen design tools before making your choiceтАЪ to ensure you find one that best suits your specific needs and skill level. Remember to look for intuitive interfacesтАЪ a wide range of optionsтАЪ and helpful tutorials or support resources.
    Refining the Design and Adding Details

  2. Your comment is awaiting moderation

    Exporting and Sharing My Design
    My kitchen renovation started with a daunting taskтБЪ finding the perfect free online design tool. I initially felt overwhelmed by the sheer number of options available. I spent several days researchingтАЪ reading reviewsтАЪ and comparing features. Some platforms boasted impressive 3D rendering capabilitiesтАЪ but lacked the intuitive interface I craved. Others offered simpler designs but lacked customization options. I needed a balance of visual appeal and user-friendliness. After much deliberationтАЪ I settled on “KitchenCraft ProтАЪ” a platform recommended by a friendтАЪ Amelia. KitchenCraft Pro offered a user-friendly drag-and-drop interfaceтАЪ a wide selection of appliances and cabinetry stylesтАЪ and surprisingly detailed customization options. The initial learning curve was minimal; I was able to navigate the software and start designing within minutes. I particularly appreciated the ability to import my own images and textures to personalize the designтАЪ ensuring it accurately reflected my unique style and preferences. The free version provided ample features for my needsтАЪ although I did note that some advanced featuresтАЪ like photorealistic renderingтАЪ were reserved for paid subscriptions. HoweverтАЪ for my purposesтАЪ the free tools were more than sufficient. The decision to use KitchenCraft Pro proved to be a great oneтАЪ setting the stage for a successful and enjoyable design process. I highly recommend thoroughly researching and comparing different free online kitchen design tools before making your choiceтАЪ to ensure you find one that best suits your specific needs and skill level. Remember to look for intuitive interfacesтАЪ a wide range of optionsтАЪ and helpful tutorials or support resources.

    fabtr.ru

    [url=https://rollstend.ru/]rollstend.ru[/url]
    B5XvZR9ny
    With my meticulous measurements and sketches in handтАЪ I headed to a local home improvement storeтАд My goal was simpleтБЪ maximize vertical spaceтАд I knew that utilizing the height of my closet was key to making the most of the limited floor spaceтАд FirstтАЪ I purchased several adjustable shelvesтАд These were a game-changer! I could customize the height of each shelf to perfectly fit my clothing and accessoriesтАд I installed them strategicallyтАЪ creating dedicated spaces for folded sweatersтАЪ jeansтАЪ and t-shirtsтАд The adjustable feature allowed me to easily rearrange the shelves as my needs changedтАд For hanging clothesтАЪ I opted for a double hanging rodтАд This clever solution doubled my hanging spaceтАЪ allowing me to fit more items in the same vertical areaтАд I hung my longer dresses and coats on the top rod and shorter items on the bottomтАд I also invested in slimline velvet hangersтАд These space-saving hangers are narrower than traditional wooden hangersтАЪ allowing me to fit more garments on each rodтАд I even swapped out my bulky wire hangers for theseтАЪ freeing up a surprising amount of spaceтАд InitiallyтАЪ I was hesitant about the cost of the double rod and the slimline hangersтАЪ but the extra space they provided was well worth the investmentтАд Seeing the transformation as I installed each shelf and rod was incredibly motivatingтАд The empty space above the rod was no longer wastedтАд I also added smallтАЪ shallow shelves above the hanging rod to store hatsтАЪ scarvesтАЪ and other accessoriesтАд The entire process was surprisingly straightforwardтАЪ and I felt a great sense of accomplishment with each shelf I installed and each item I neatly hungтАд The previously chaotic space was slowly transforming into a well-organized and efficient systemтАд It was truly satisfying to see my vertical space put to such good useтАд
    How Often Should You Drain Your Hot Water Heater?

  3. Your comment is awaiting moderation

    Refining the Design and Adding Details
    Experimenting with Different Layouts

    https://callmeconstruction.com/building/building-strong-walls-a-guide-to-mortar-and-material-bonding/

    [url=https://callmeconstruction.com/bathroom/my-craftsman-bathroom-renovation-a-personal-journey/]https://callmeconstruction.com/bathroom/my-craftsman-bathroom-renovation-a-personal-journey/[/url]

    AgakRJuhq23k

    With a satisfying L-shaped layout as my baseтАЪ I delved into the finer detailsтАЪ transforming my digital sketch into a truly personalized design. I meticulously selected cabinet styles from the extensive library offered by the softwareтАЪ opting for sleekтАЪ modern shaker-style cabinets in a warmтАЪ honey-toned oak finish. The program allowed me to visualize these choices in real-timeтАЪ rotating the cabinets to ensure they complemented the overall aesthetic. NextтАЪ I chose countertops. I initially considered graniteтАЪ but the virtual rendering showed it clashing slightly with the cabinet color. I then experimented with quartzтАЪ settling on a beautifulтАЪ light-grey option that beautifully contrasted with the oak. The software’s realistic rendering capabilities were invaluable here. I spent a considerable amount of time tweaking the backsplashтАЪ finally settling on a subway tile pattern in a soft whiteтАЪ which provided a clean and classic look. Adding lighting was another key step. I strategically placed recessed lighting above the countertops and pendant lights above the islandтАЪ creating a warm and inviting ambiance. I even experimented with different flooring optionsтАЪ virtually laying down various types of tile and hardwood to see how they interacted with the rest of the design. I was particularly pleased with a light-colored oak wood floor that tied in seamlessly with the cabinetry. Beyond the major elementsтАЪ I focused on the smaller details. I carefully selected hardwareтАЪ opting for brushed nickel pulls and knobs that added a touch of sophistication. I also integrated various appliancesтАЪ choosing models based on their size and aestheticsтАЪ ensuring they fit harmoniously within the design. The software allowed me to fine-tune every aspectтАЪ from the placement of outlets to the positioning of spice racksтАЪ ensuring a highly functional and visually appealing kitchen. It was a truly rewarding processтАЪ seeing my initial concept evolve into a cohesive and detailed designтАЪ ready to be shared and potentially implemented in the real world. The level of customization was impressiveтАЪ allowing me to create a space that was uniquely mine.
    My kitchen renovation started with a daunting taskтБЪ finding the perfect free online design tool. I initially felt overwhelmed by the sheer number of options available. I spent several days researchingтАЪ reading reviewsтАЪ and comparing features. Some platforms boasted impressive 3D rendering capabilitiesтАЪ but lacked the intuitive interface I craved. Others offered simpler designs but lacked customization options. I needed a balance of visual appeal and user-friendliness. After much deliberationтАЪ I settled on “KitchenCraft ProтАЪ” a platform recommended by a friendтАЪ Amelia. KitchenCraft Pro offered a user-friendly drag-and-drop interfaceтАЪ a wide selection of appliances and cabinetry stylesтАЪ and surprisingly detailed customization options. The initial learning curve was minimal; I was able to navigate the software and start designing within minutes. I particularly appreciated the ability to import my own images and textures to personalize the designтАЪ ensuring it accurately reflected my unique style and preferences. The free version provided ample features for my needsтАЪ although I did note that some advanced featuresтАЪ like photorealistic renderingтАЪ were reserved for paid subscriptions. HoweverтАЪ for my purposesтАЪ the free tools were more than sufficient. The decision to use KitchenCraft Pro proved to be a great oneтАЪ setting the stage for a successful and enjoyable design process. I highly recommend thoroughly researching and comparing different free online kitchen design tools before making your choiceтАЪ to ensure you find one that best suits your specific needs and skill level. Remember to look for intuitive interfacesтАЪ a wide range of optionsтАЪ and helpful tutorials or support resources.

  4. Your comment is awaiting moderation

    Inputting My Measurements and Preferences
    With a satisfying L-shaped layout as my baseтАЪ I delved into the finer detailsтАЪ transforming my digital sketch into a truly personalized design. I meticulously selected cabinet styles from the extensive library offered by the softwareтАЪ opting for sleekтАЪ modern shaker-style cabinets in a warmтАЪ honey-toned oak finish. The program allowed me to visualize these choices in real-timeтАЪ rotating the cabinets to ensure they complemented the overall aesthetic. NextтАЪ I chose countertops. I initially considered graniteтАЪ but the virtual rendering showed it clashing slightly with the cabinet color. I then experimented with quartzтАЪ settling on a beautifulтАЪ light-grey option that beautifully contrasted with the oak. The software’s realistic rendering capabilities were invaluable here. I spent a considerable amount of time tweaking the backsplashтАЪ finally settling on a subway tile pattern in a soft whiteтАЪ which provided a clean and classic look. Adding lighting was another key step. I strategically placed recessed lighting above the countertops and pendant lights above the islandтАЪ creating a warm and inviting ambiance. I even experimented with different flooring optionsтАЪ virtually laying down various types of tile and hardwood to see how they interacted with the rest of the design. I was particularly pleased with a light-colored oak wood floor that tied in seamlessly with the cabinetry. Beyond the major elementsтАЪ I focused on the smaller details. I carefully selected hardwareтАЪ opting for brushed nickel pulls and knobs that added a touch of sophistication. I also integrated various appliancesтАЪ choosing models based on their size and aestheticsтАЪ ensuring they fit harmoniously within the design. The software allowed me to fine-tune every aspectтАЪ from the placement of outlets to the positioning of spice racksтАЪ ensuring a highly functional and visually appealing kitchen. It was a truly rewarding processтАЪ seeing my initial concept evolve into a cohesive and detailed designтАЪ ready to be shared and potentially implemented in the real world. The level of customization was impressiveтАЪ allowing me to create a space that was uniquely mine.

    https://callmeconstruction.com/kitchen/best-black-friday-kitchen-appliance-deals-2021/

    [url=https://callmeconstruction.com/kitchen/how-to-get-hot-water-faster-at-your-kitchen-sink/]https://callmeconstruction.com/kitchen/how-to-get-hot-water-faster-at-your-kitchen-sink/[/url]

    AgakRJuhq23k

    Choosing the Right Online Tool
    After inputting my measurements and preferencesтАЪ I dove headfirst into the exciting world of layout experimentation. KitchenCraft Pro offered a plethora of optionsтАЪ from the classic galley style to the more spacious L-shape and U-shape designs. I started by exploring the galley layoutтАЪ digitally dragging and dropping cabinets and appliances to visualize the workflow. I quickly realized it wouldn’t suit my needs тАУ the limited counter space was a major drawback. NextтАЪ I experimented with an L-shape configurationтАЪ strategically placing the sinkтАЪ stoveтАЪ and refrigerator to form an efficient work triangle. This felt more promising. I meticulously adjusted the placement of islands and peninsulasтАЪ carefully considering their impact on traffic flow and overall spaciousness. The software’s intuitive drag-and-drop functionality made this process remarkably easy and enjoyable. I even tried a daring U-shaped designтАЪ envisioning a grandтАЪ chef-like workspace. While initially appealingтАЪ I found it slightly cramped for my needs. The software allowed me to easily switch between different layoutsтАЪ instantly visualizing the impact of each change. I spent hours tweaking the arrangement of cabinetsтАЪ appliancesтАЪ and workspacesтАЪ constantly evaluating the practicality and aesthetic appeal of each configuration; I played around with different cabinet depths and widthsтАЪ experimenting with the placement of pantry units and maximizing storage space. I even considered adding a breakfast bar to one of the layoutsтАЪ envisioning family gatherings around it. The ability to instantly see the results of my adjustments was invaluableтАЪ allowing me to make informed decisions based on both functionality and personal preference. It was a truly iterative processтАЪ refining and perfecting the design until I found the perfect balance between form and function. Through this experimentationтАЪ I discovered that the L-shape layoutтАЪ with a cleverly positioned islandтАЪ provided the optimal blend of efficiency and spaciousness for my kitchen.

LEAVE A REPLY

Please enter your comment!
Please enter your name here