


A light tent can be confusing to use, mostly if you have never used it before and has no idea. Photographers mostly use light tents. You can use it to take beautiful pictures of products or anything you wish to. This mini studio requires different techniques to use them depending on the type you are using. And using a light tent isn’t as hard as people think. In this article, you find a way on how to use a light tent.
What is a Light Tent?
A light tent acts as a diffuser from a light source to have a photo with no shadows. It helps take professional images for your products. They work best, taking pictures of objects that are very shiny. The tent has translucent sides on it, and it diffuses the light from the light sources. Light tents come fully packaged with the necessary equipment. These include the tent itself, two bulbs, a tripod, two light stands, and fabric backdrops that act as the background.
All these gears come with a purchased light tent. There is also a way to create your light tent from scratch. If you decide to make it yourself, you will have to buy the kits for use with the tent separately. You are sure to find the required equipment in your local store locally. Any piece of clothing that is pressed smoothly with iron can act as the backdrop. It should get cleaned well to remove any dirt or debris. We want it to be clean as possible.
When to Use a Light Tent
It is essential when it is an ideal time to use a light tent if you want to use it correctly. Taking photos during the day and the night will have a difference. When you want to shoot pictures, it is best not to have a direct light of sunshine to the tent. The power source will give you the needed illumination for the photos.
Choosing the Appropriate Light
You need to choose the best light for the light tent. To determine the appropriate lighting, have three fluorescent bulbs. It would help if you picked the white balance before finally taking photos with the light tent.
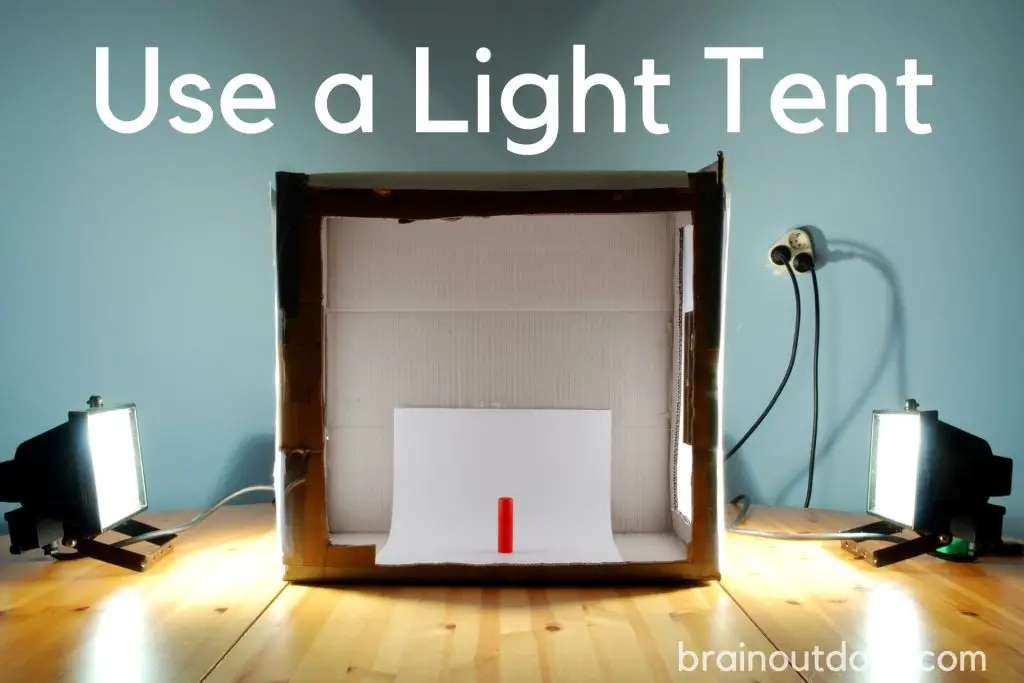
Place two lights, each on both sides of the tent. Ensure that you get to place them directly on the tent light. You can also create the white balance manually using a card. Take a photo from the white card and then use the image you get to adjust any necessary adjustments.
Choosing the Right Size
Light tents come in various sizes. They may be the same shape, but the size will always vary. The size you get will depend on the size of the products. For more significant effects, go for large-sized light tents and vice versa.
Setting up the Light Tent
A light tent is easy to set up when you want to use it. To get stunning photos, you will have to set it up correctly. Place the tent in an erect position when setting it up. Take the products you wish to take photos of and place them inside the tent. Ensure you situate them at the center of the lightbox. To get even lighting, set the illumination for you to get a light even on the tent.
Backgrounds
There are various when it comes to using the appropriate background for the products. Some of the stages one can opt to use are either white or black background. The white color will give you a better one compared to the black one. You get to have quality photos with impressive backgrounds. The rule of thumb is that with black, you get a – 1, and with one that is white, you get a + 1. Sometimes a full stop can be too dark or even be too light when used. If this happens, give a half stop or even a third instead of the full stop.
Placing the Source of Light
There are many ways you can choose to place the source of light. Sometimes you will get an even light illumination with the light source facing the center of the tent. Another option will be to have it at a certain angle where photos will look best.
Use a Tripod
Do not forget to make use of a tripod when using the light tent. It improves stabilization for you to get professional quality photos. When it comes to setting the camera, go for the manual exposure. Secure the camera on the tripod to avoid getting blur photos due to shakiness. A camera that is still will produce the sharp images you require. Tripods come with remotes that help take pictures without having to touch the camera.
Set the Camera
When you already have a clear shot, and you are ready to take a photo, press the remote shutter. Alternatively, you can use a timer on the camera. Set the camera and press the timer, give it a few seconds to automatically take photos. It will take the shots once the camera is ready and the allocated time is over. Set the camera to a 2-second timer, and it won’t make you stay for long waiting for the camera to take a capture.
Experiment with Light
Before taking the professional products you need for the, try out with a few samples. Experimenting gives you an overview of how the results will look like at the end. Play around with different camera angles, backgrounds to see what works best for you.
A light tent is not that difficult to use. It requires the right approach and technique to handle this kind of photography. When you use the light to get good pictures for your products, have the correct setup. The moment you purchase a light tent, you most definitely get all the equipment you need. Find ways to achieve the white balance, assemble everything, and you will not find trouble handling it. We hope this article gives you the necessary information to get you started with using a light tent


