The majority of people use their right hand as their dominant hand. Being left-handed does not mean you get left out. A fishing reel can be adjusted to fit your condition. Perhaps you recently had a new reel, and you are stuck on how to use it since you are left-handed. Or maybe you struggle with using it when it is right-handed. In this article, we’ll tell you how to change a fishing reel from right to left-handed easily.
Understand The Parts Of The Reel
Before attempting to switch the reel from right to left-handed, it is crucial to know the components you are dealing with for this project. You can’t try to fix what you have no idea about and understand what needs to be changed. The more knowledge you have about what makes up a fishing reel, the more you will find it easier to switch it. Disassembling and reassembling won’t be a hard task to try.
Types Of Reels
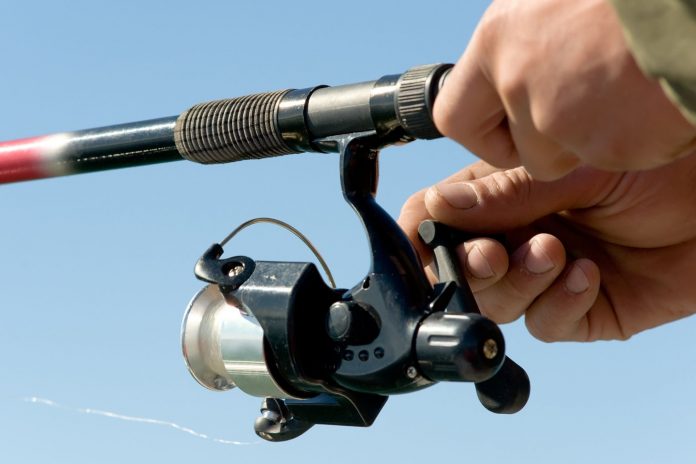
Fishing reels come in various types such as spinning, spin-cast, bait casting, and a conventional reel. Each of these components is different in terms of structure. The type of reel you get to use relies on the type of fish you intend to fish. The common one that gets to be changed is usually the spinning reel. Its components include bail, body, drag adjustment knob, gearbox, handle, spool, and an anti-reverse switch to keep the reel from rotating backward.
Prepare The Working Surface
The reel involves small components that require one to be extra careful not to lose any part during the process. Working on an area where you can easily locate a part if it gets lost or misplaced is equally important. If you happen to lose any part, it will affect the whole fixation process.
Changing From Right To Left
There are few steps involved in this process. The processes are quick and easy to understand. It is something you can do yourself without needing professional help as long as you understand the components. You can only experience difficulty when you do not familiarize yourself with what you are working on; that is the reel itself.
Step:1 Disassemble The Fishing Reel
The first thing you want to do is disassemble the fishing reel when it is possible to switch it. No special tools are needed for this project, just everyday tools. A screwdriver is a versatile tool used for fixing almost anything. Place the reel in an upright position and remove the reel from the handle.
Step:2 Removing The Arbor
Different types of reels are secured differently, but most of them have screws on them. To unscrew, you will use the screwdriver for every screw that needs to be loosened. Remove the arbor from the reel by unscrewing the cap located at the center of the arbor. Apply a little pressure on it to remove the spool.
Step:3 Remove Retention Clip And Bearing Cylinder
A retention clip is what holds and keeps the bearing in place. It would be best to remove it to avoid losing it during the removal process. Do take out the bearing cylinder as well.
Step:4 Unwind The Fishing Line
One important thing you need to do is unwinding the fishing line. When unwinding the reel, you need to have a place that it will be put – somewhere where it can’t easily tangle. The best way will be to wrap it around the cardboard. Alternatively, if you have a new or old fishing reel, you can wrap it on it. Ensure it is well kept as you are going to use it a second time.
To make unspooling be faster, you will need to have an empty plastic bottle. Create a hole in the cap by drilling into it. Place a screw that tightly fits on the hole. Connect a drill with the bottle’s cap with the screw and have the loose end of the line attached to the bottle. Insert a screwdriver onto the spool and go a little traditional like the days of the cassette players. Power up the drill to spool the entire line to the surface of the bottle.
Step:5 Turn The Bearing
It is the bearing that determines the position of the fishing reel. The reel can either move clockwise or anticlockwise. Do the opposite of how the bearing faced when the reel was right-handed. Please change it to the opposite direction and be careful not to damage it during this process accidentally. The side that was facing down should now face up and vice versa. Take back the line and rewind it on the reel.
Step:6 Assemble The Reel
Now that the reel is in place, it’s time for you to take back the components you previously removed. It changes the direction of the winding and leaves you with a left-handed fishing reel. Do the reverse of the steps involved when disassembling the reel. Replace the retention clip by placing it on top of the bearing. Put back the arbor and the rest of the other components. Test the reel to be sure it is working correctly.
Step:7 Put The Reel On The Rod
Rotate the reel to 180 degrees direction, and then you can now have it back on its seat. It makes it suitable for left-hand casting.
Step:8 Spool The Line
Finish off by spooling the line back to the reel. One mustn’t miss doing correctly. Place the end of the line to the reel with an arbor knot. Wind the line in the correct direction while putting on tension to it.
You don’t have to be left-handed to change the reel from right to left. Sometimes you might be interested in trying something new. The hand – whether right or left – that feels comfortable using the reel is what matters. Shifting to casting with a right hand and then reeling with a left hand is relatively easy. This method can work on any fishing reel you own. There isn’t much needed other than disassembling, spooling, changing directions, and assembling the parts again.


